Reversing Camera Kit for Peugeot Boxer (2006-Present) to fit Brake Light | PM39BLA
Our Peugeot Boxer brake light reversing camera kit with a 7" rear view mirror monitor to fit 2006 onwards vans. Factory look, durability, high-quality image, 2-year guarantee, and lifetime support from the forum/fitter favourites - Reversing Cameras UK Ltd.
2006 - Present Peugeot Boxer Brake Light Reversing Camera Kit with 7" Mirror Monitor
- Top Image Quality - The Peugeot Boxer brake light reverse camera is fitted with our favourite image sensor and lens combination - the 4089 700tvl image sensor, coupled with the 4 layer quality composite glass lens.
- Excellent Night Vision - With an external lens, a premium modern CMOS high resolution image sensor, and externally separated IR LEDs you can expect a very good night time image.
- Durable Build Quality - We rarely hear of one of our brake light reversing cameras failing. This is because we insist on using who we consider to be the best brake light camera manufacturer that exists today.
- Factory Fit Look - My father opted for this model when he owned his motorhome conversion van. This model we call the slimline version, on account of it's very low profile. It looks as though it left the factory with it added as an option.
- Reversing Safety, and Stress Free Parking - With the 130 degree lens and the quality image sensor installed, you can see obstacles around the rear of your van or motorhome conversion van as you manoeuvre around them. Reduce the likelihood of damage, or injury to others with the Fiat Ducato brake light reverse parking camera.
- Optional Guidelines to Assist Parking - The Peugeot Boxer brake light reversing camera comes with coloured parking guidelines turned on as standard. These can be removed via the trigger wire loop next to the plug. *Please note that we currently have two versions of this kit, one with guidelines and one without. If you have a preference as to which we supply please leave a customer note during checkout.
- Choice of Mirror Monitor Mounting Method - You can select either a clip-over mirror monitor, or one of the few attach direct-to-windscreen methods (see further down in the description for more details)
- Bolt from the Rear Fixings - This can also fit brake lights that screw in from the front (simply remove the spacers that the screws secure against - these screws are bolted from the rear).
- No CANBUS issues and Easy Fit - Due to the 4 pin cabling used on this reversing camera system. We prefer 4-pin based systems because it means the monitor can provide power to the camera, and this avoids CANBUS issues that can occur if taking power from the reverse light. The monitor we use provides power down an all-in-one screw together cable making fitting easy.
- Adjustable Tilt Camera - The camera has some up/down adjustability however it can't be angled high enough to give a view back down the road. If you require this function, please see our twin lens brake light reverse parking and rear view camera kit for Peugeot Boxer.
- New LED Strip Built into Camera - The camera has an LED strip built into the brake light, this is connected to a socket, your old plug may insert into this, however, because there have been a few types of plug/socket over time it might be necessary to solder/crimp the wires instead, a plug that terminates in red/black bare wires is provided to help you do this.

Choice of fixing method - New for 2024. We were often asked by customers who wanted to fit this style of camera if we could produce a version that would fit by screwing from the front of the camera instead of bolting from the rear - especially, if the customer has a Van Conversion Motorhome, where access to rear bolts is difficult. If you do prefer the bolt from rear method, we have kept this as an option, please use the selection box above when ordering.
A vloggers video about fitting the brake light reversing camera kit
Have a watch of a vloggers YouTube video below, which shows his install to his van conversion. Apologies if the thumbnail has click bait titles that change from time to time.
Tidy Factory Look Fit
The photo below was of my father's old van conversion motorhome. He chose the bolt from the rear slimline version for his motorhome. If we had the dual lens version at the time of fitting, he would have had that instead.

Quality Image Sensor and Lens
- We use a premium modern 700TVL CMOS sensor to capture the image, coupled with a very high quality 4x glass layer composite lens. All glass lenses avoid the fading experienced with the cheaper 2x plastic, 2x glass lenses common on cheaper reversing cameras.
- This brake light reversing camera has the lens fitted externally, which means you get a wider field of view when compared to models that have the lens mounted behind a glass cover.
Guarantee and Support:
- Comes with a 2-year guarantee.
- Offers lifetime support from UK specialists.

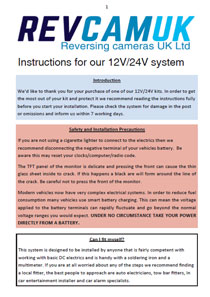
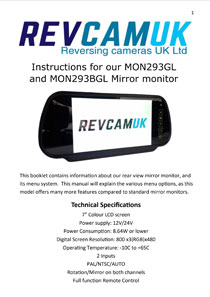
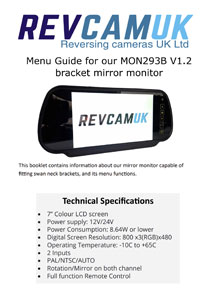
For more information including main reversing camera kit instructions, and monitor instructions, please click the tab for PDF instructions. If you would like any information/questions that may not be present, please contact us.
Choose your preferred mirror monitor mounting option :
- Have a mirror? Choose our clip-over mirror option, we will supply you with a rear view mirror monitor that clips over your existing interior mirror.
- Don't have a mirror but have a twist type hexagonal shaped metal mounting plate/button on the windscreen for one? (usually hidden behind a plastic trim/cover. Then choose the ACCMB2+MP35 swan neck bracket option, we will supply you with our MP35 (Mounting Plate 35) and Swan neck bracket, these will secure to the hexagonal shaped button and fix to the back of the mirror monitor (which we will provide with screw holes on the rear for the bracket to screw in to. This type of mounting plate is most commonly found on later model Ducato, Boxer and Relay Vans. Download the PDF fitting instructions for attaching MP35 to the hexagonal shaped windscreen plate here.
- Don't have a mirror but have a slide down type metal mounting plate/button on the windscreen for one? then choose the ACCMB7 swan neck bracket option. We will supply you with our swan neck bracket compatible rear view mirror monitor + the swan neck bracket designed to fit to the windscreen slide type metal mounting plate.
- Don't have a mirror and don't have a metal button on the windscreen? Choose our ACCMB2 + Button + Glue option, we will supply you with the bracket compatible monitor, a Ford Button to bond to the windscreen, Loctite 319 windscreen button adhesive to bond the button up, as well as full instructions on how to mount a windscreen button with Loctite 319 adhesive. We have researched videos, reviews, and manufacturer recommendations to provide the best instructions available to get the job done correct, first time.

Quality Image Sensor and Lens
- We use a premium modern 700TVL CMOS sensor to capture the image, coupled with a very high quality 4x glass layer composite lens. All glass lenses avoid the fading experienced with the cheaper 2x plastic, 2x glass lenses common on cheaper reversing cameras.
- This brake light reversing camera has the lens fitted externally, which means you get a wider field of view when compared to models that have the lens mounted behind a glass cover.
Power Connection Options
You have the option to add additional leads that plug in to a DC socket on the monitor wiring harness. You will always be supplied with the standard power wire, which gives you a red wire and a black wire to solder / crimp to a power supply.
On the drop down menus you will notice there are two options selectable. One to add a lighter plug, one for a fuse tap. Scroll down for details on each option.
Lighter Plug
Selecting this option adds an additional lighter plug lead - attaches to a socket on the end of the 300cm monitor wiring loom/harness. Some people order this option just to try out there new kit before hardwiring permanently.

Fuse Tap (Mini blade, Standard blade)
Selecting this option adds an additional easy-wire fuse tap lead with built in earth terminal connector.
We designed and had this product produced in 2023, and they have been very popular. We wanted to create something that meant our customers could hardwire a reversing camera system to their vehicle with ease and minimal tools. Fuse taps have already become popular for installing dash cams, so we wanted to make them more popular for reversing camera kits too.
Usually fuse taps have no earth terminal connector and require crimp tools to connect to your wiring - our easy wire fuse tap kits are different. They come supplied with 2M of twin wire (power + earth) attached. The wires can be pulled apart should you wish to earth to an area far from the fuse box.
Choose a fuse that's active when the ignition is on. Remove the original fuse and place it in the empty slot of the fuse tap. The correct rated fuse for the new camera system is supplied already installed in the correct slot. Install the fuse tap (with the two fuses fitted) in to the fuse box (where you removed the original fuse). Lastly, connect the earth terminal to a chassis bolt or screw (or add a new bolt/screw to secure it).
The mini blade is the most commonly seen fuse size on modern vehicles.

Standard blade used to be the most common fuse size installed, and is still commonly seen, even on very recent vehicles.

PDF Instructions
We aim to provide as much information as possible to assist with both the installation and use of our equipment (something we here is very rare nowadays). If you require any further assistance with any aspect of the fitment then please contact us. Also, if you feel anything could be added to our instructions or a sticker produced for the box to assist in guidance, please let us know. We get better with your assistance.
 Click preview image to download the PDF file | For all of our cabled reversing camera kits Our main 4 pin reversing camera kit instructions. We prefer 4 pin screw locking connector cables in our kits for numerous reasons (no canbus issues, stable voltage, ability for always on, reliability, and heavy duty connectors). This downloadable PDF file will give you all the advice you will need. Some of our cameras will come with extra specific guidance or manuals to help that specific install. |
 Click preview image to download the PDF file | Clip-Over Option Mirror Monitor Instructions If you choose a mirror monitor kit and you don't select the AHD upgrade option then this monitor will be supplied. It is a great monitor with lots of menu options, lovely colour, adjustable guidelines, and good viewing angle range. |
 Click preview image to download the PDF file | Bracket to Windscreen Mirror Monitor Instructions If you choose a mirror monitor kit with a direct to windscreen swan neck mount option, then this will be the monitor that is supplied. This guide will teach you about adjusting guidelines, wiring, and other menu settings. |
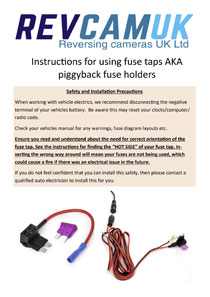
If you are ordering the Mini Bade or Standard Blade Fuse Tap power option, then please see the further instruction sheet below dealing with this time saving connection method.
 | Instructions for fitting Fuse Taps / Piggyback fuse holders for power supply Our guide on how to correctly install a piggyback fuse holder tap to power a reversing camera system from the fuse box. |
Monitor
7” Diagonally Measured Colour LCD screen
Power supply: 12V/24V
Power Consumption: 7.5W Max
Digital Screen Resolution: 800 x3(RGB)x480
2x 4 pin Inputs
PAL/NTSC/AUTO
Camera
Sensor: 1/3" PC4089 CMOS
Effective Pixels: 976(H) x 592(V)
TV line: 700 TVL
Lens: 1.9mm
Min illumination: 0.0 LUX (IR LED on)
IR LEDs: 8 pcs
Night vision: 10m
Waterproof: IP68
View angle: V 85 degrees, H 130 degrees D 160 degrees
Camera lens adjustment: 20 degrees up and down
Voltage: 12 volts
Current consumption: 150mA
Operating temperature: -20 to 70 degrees C
Guideline: Optional (some have a trigger wire to select)
Certificates: FCC, CE, E-mark, RoHS
Connector: 4 pin aviation
Mainland UK Shipping
We have three postage options to select from during checkout (on larger items eg kits there will be two options):
Royal Mail Tracked - Smaller / Lighter weight orders. This will be sent via Royal Mails Tracked Service. They will send emails/SMS to inform you of the tracking events. This option won't be shown for heavier weight orders.
DPD 2 Day. Small or large orders. This will be sent with DPD Local and should arrive within two working days (if you place the order before 12:30PM).
DPD Next Day. Small or large orders. This will be sent with DPD Local and should arrive the following working day (if you place the order before 12:30PM).
Highlands and Islands UK Shipping
We offer a 2-3 day service fulfilled with either Royal Mail Post, or Parcel Force. The prices charged are identical to mainland UK. Small orders will be sent via the post, larger orders via Parcel Force.
Outside of the UK Shipping
We shop around when selecting the best method for Europe (we avoid the cheap budget couriers due to parcels being lost). Southern Ireland is always sent via DPD. Other countries will usually be either Parcel Force, UPS, or Fedex. Please note that we require a phone number for international deliveries. Also if you are a company in Europe, a VAT number or EORI number will help speed up customs.
We remove the UK VAT (Tax) when any country other than the UK is selected in the shopping basket or checkout. From this point all prices on the site drop down to exclude VAT. If you are from the Channel Islands, please select Jersey / Guernsey from the country list in order to remove UK sales Tax.
60 day "Change of Mind" policy
We understand that for whatever reason you may need to return your purchase. We provide a 60 day opportunity for you to do just that. Simply give us an email or a phone call to let us know it is due back. You are responsible for the shipping back to us but you will receive a full refund including the original shipping we charged you for your order. We recommend getting a signed for or proof of postage when posting back to us.
All we ask is that you return the items in the condition they were sent in, with the packaging present. You are welcome to have temporarily tested the product and unravelled things, but if you have cut wires, soldered, glued, installed and used for a while then this wouldn't be suitable for returns under the change of mind policy.


