Sony Image Sensor Bumper Bullet Reversing Camera Kit with 5" Display | PM54-SD
A reversing camera kit that includes our compact 5-inch display and flush-fitting bumper/bullet reversing camera. The high-resolution digital LCD panel on the monitor and the Sony 1/3" CCD 600tvl image sensors on the camera mean you can expect a good picture quality day and night. Experience safer reversing and reduced stress with this quality reverse camera kit.
5" Monitor + "Bullet" Bumper Reversing Camera Kit Details
This reversing camera system bundle combines our compact 5-inch display and a cylindrical "bullet" reversing camera that can be fitted in to a bumper. The flush fitting camera is very discreet, fitted with night vision, and a quality Sony image sensor.
High Resolution Display - Our compact 5 inch stand/dash mount monitor display still packs a punch thanks to it's 800x480 pixel digital hi-res LCD panel. This resolution can handle even the highest resolution of traditional CVBS signal reversing cameras (CVBS signal still makes up 95%+ of all existing reversing camera systems).
High Resolution Reversing Camera - The bumper camera in this kit has a choice of two image sensors (both from Sony). For a wider angle choice, select our Sony CMOS 700tvl option, which is fitted with the Sony IMX224 sensor. For 90 degree choose our Sony 639 700tvl 1/3" CCD image sensor. The image sensor has the largest impact on picture quality, so a quality one such as the two options will give you a good quality picture.
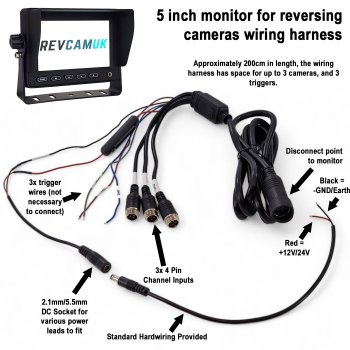
Easy-Fit Wiring - This system uses a 4 pin screw locking connector, with the monitor providing power to the camera. You could even run the whole system of an optional lighter plug for instant install.
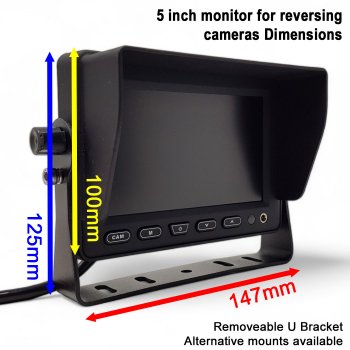
Compact Size Monitor Display- The 5 inch LCD display means that this monitor is compact and fits vehicles that are more restricted for size. Luckily the number of pixels is still the same as the larger 7 inch display.
Two Year Guarantee and Lifetime Support - This monitor and reversing camera kit should last a very long time without any issue. We guarantee it to be free from faults for two years. After two years we are able to offer low cost repairs on the monitor to keep your system in good condition and avoid extra time or expense installing all new components. We also keep good stock of spare parts such as wiring harnesses, cables, and cameras should you decide to take the monitor out of the vehicle with you when you sell your vehicle but leave the wiring where it is.
Various Bracket Options (see tab) - The standard U Bracket can either be mounted down on to a flat piece of dashboard area, or you can invert the bracket and have it hanging from the ceiling. The monitor also has a rear channel that is designed to fit any of our range of stand style monitor brackets. Add one discounted bracket by using the drop down menu on this listing. For more details click on the monitor brackets tab.
Multiple Power Options Including Lighter and Fuse Taps (see tab) - We want to make wiring your new reverse camera system in as simple as possible. To this end, we offer a few additional options for powering the system up. As the monitor powers the camera down the all-in-one screw locking cable, the power supply you provide the monitor will in turn supply the camera. We always provide the standard hardwiring (a simple red and black wire to connect), but you are also able to add fuse taps and lighter plugs that link to the DC socket on the monitor wiring. Our fuse taps are not your bog standard crimp on type, they were designed by us and have 200cm leads with a fuse tap on the red wire, and an earth terminal attached to the black wire. Hardwiring with no crimps/soldering. For more details click on the power options tab.
Flexible Cable Length Options, including Adaptors - We produce our own bundles from our favourite factories. We combine the best monitor factories, with the best reversing camera factories, and then link it all up with pure copper extension cables from our favourite cable manufacturer. This means we are able to offer customisation such as different length extension cables, adaptors, and convenience features such as our 8mm disconnect points (to get cables through tight gaps/small holes) Using the drop-down menu above, you can select from a range of cable lengths and adaptors. See cable length options tab for more details.
For more information including instructions, please click the tab for PDF instructions. If you would like any information/questions that may not be present, please contact us.
Cable Length Options
This drop down menu allows you to select the length of cable that goes between the camera and the monitor wiring harness. When choosing cable length, please be aware that there is between 2-3M length supplied with the monitor wiring, whilst the reversing camera has another approx. 0.5M. We use quality pure copper 4 pin screw locking connector cables to ensure a long lasting, stable picture.
What Length Should I select?
5M (16ft) - Ideal if you have a very small vehicle e.g. a car or compact van.
7.5M (24ft) - Recommended for large cars, 4x4, and some smaller vans.
10M (32ft) - Most popular length for standard sized vans.
12.5M (41ft) - Most popular length for Motorhomes and larger vans.
15M (49ft) - Ideal for large Motorhomes and HGV/LGV.
20M (65ft) - Fits very large vehicles e.g. HGV, Coaches, and LGV.
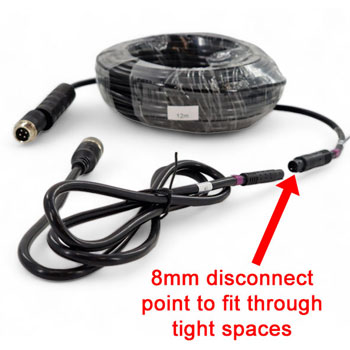
8mm Disconnect Link
We are able to offer a small disconnect 8mm point on our 10M/12.5M/15M cable lengths. This is located 100cm from the front side of the cable (next to the monitor). This means you can run the cable through tight gaps/cupboards/bulk heads with just a small 8mm hole/gap required, reconnecting the larger connector once you have your cable next to the monitors wiring harness.
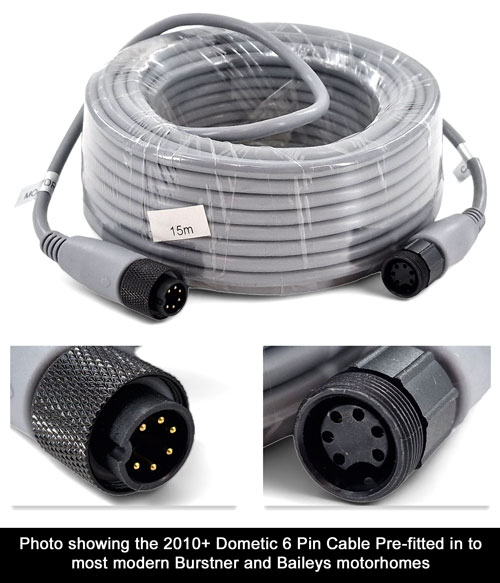
2010+ Dometic/Waeco Cable Adaptors
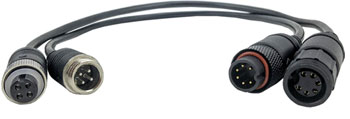
We often see motorhomes pre-fitted with the 2010+ Dometic/Waeco cable. Most commonly this is seen on Baileys, Burstner, and Hymer motorhomes, although has been found on a wide assortment of others too. See the photo below for an image of what this type of cable looks like.
If you choose the option for the adaptors then you will receive an adaptor to place on both sides of your existing cable (we won't give you a long cable). Essentially this turns your existing pre-fitted cable in to one of our 4 pin cables. See photo below of the pair of adaptors you will receive.
Additional Monitor Bracket Options
To add a discounted price additional monitor bracket to your product bundle, please see the descriptions/photos below. We also have a YouTube video showing the various bracket options below.
ACC035 - "Butterfly" Bracket option
So called because the base looks like a pair of butterfly wings. Fitted with an adhesive pad on the base, peel the protective layer off and stick to your clean dashboard. Additional screws can be used if you feel it needs reinforcement. The square nut fits in to the channel of your monitor, whilst there is a screw to the rear of the bracket that will then screw in to the square washer until it locks the two together.

ACC041 Quick Release Bracket option
The quick release bracket is one of the most popular bracket options. The bracket has a removable mounting plate that attaches to the rear channel of the monitor. This plate can then slide in to the bracket that is mounted to the dashboard and locks. To release, simply pull back the thumb switch at the rear, then slide the monitor up and out. Our monitors have disconnect points around a foot away from the monitor to allow it to disconnect. A bracket that makes initial install a little quicker, as well as allowing more adjustability in positioning of the display. Adhesive pad base for sticking to clean dashboard with bendable feet.

ACC705B - Heavy Duty Rear Mount Bracket Option
The most sturdy of all of our rear mounted dash mounts, all metal design. Monitor slides on to the bracket, which has a rear adjustment rotational wheel to lock the monitor to the bracket. Self adhesive base, with bendable "feet" for curvy dashboards. You can add screws if required.

ACC038 - Suction Mount Bracket Option
Only designed for temporary mounting eg. moving a monitor from one vehicle to another. This bracket has strong suction, people are often shocked by how strong it is. We use these when we road test new monitors for temporary mounting. A ball joint allows for good adjustment to give the monitor the optimum viewing angle.

ACC20540 - "Banana" Ceiling Mount Swan Neck Bracket Option
The ceiling mount bracket is a very sturdy and adjustable bracket mount for the monitor in this kit. Two screws secure this to the ceiling or plastic trim of the vehicle. The other side attaches to the channel on the back of the monitor and secures with a twist of the locking wheel. Release the tension by turning the hand screw knob on the left to allow the ball joint to rotate clockwise and anticlockwise, or up/down/left/right. These have been a very popular option since they were introduced.

Power Connection Options
You have the option to add additional leads that plug in to a DC socket on the monitor wiring harness. You will always be supplied with the standard power wire, which gives you a red wire and a black wire to solder / crimp to a power supply.
On the drop down menus you will notice there are two options selectable. One to add a lighter plug, one for a fuse tap. Scroll down for details on each option.
Lighter Plug
Selecting this option adds an additional lighter plug lead - attaches to a socket on the end of the 300cm monitor wiring loom/harness. Some people order this option just to try out there new kit before hardwiring permanently.

Fuse Tap (Mini blade, Standard blade)
Selecting this option adds an additional easy-wire fuse tap lead with built in earth terminal connector.
We designed and had this product produced in 2023, and they have been very popular. We wanted to create something that meant our customers could hardwire a reversing camera system to their vehicle with ease and minimal tools. Fuse taps have already become popular for installing dash cams, so we wanted to make them more popular for reversing camera kits too.
Usually fuse taps have no earth terminal connector and require crimp tools to connect to your wiring - our easy wire fuse tap kits are different. They come supplied with 2M of twin wire (power + earth) attached. The wires can be pulled apart should you wish to earth to an area far from the fuse box.
Choose a fuse that's active when the ignition is on. Remove the original fuse and place it in the empty slot of the fuse tap. The correct rated fuse for the new camera system is supplied already installed in the correct slot. Install the fuse tap (with the two fuses fitted) in to the fuse box (where you removed the original fuse). Lastly, connect the earth terminal to a chassis bolt or screw (or add a new bolt/screw to secure it).
The mini blade is the most commonly seen fuse size on modern vehicles.

Standard blade used to be the most common fuse size installed, and is still commonly seen, even on very recent vehicles.

PDF Instructions
We aim to provide as much information as possible to assist with both the installation and use of our equipment (something we here is very rare nowadays). If you require any further assistance with any aspect of the fitment then please contact us. Also, if you feel anything could be added to our instructions or a sticker produced for the box to assist in guidance, please let us know. We get better with your assistance.
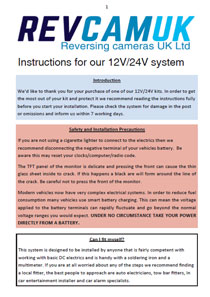 Click preview image to download the PDF file | For all of our cabled reversing camera kits Our main 4 pin reversing camera kit instructions. We prefer 4 pin screw locking connector cables in our kits for numerous reasons (no canbus issues, stable voltage, ability for always on, reliability, and heavy duty connectors). This downloadable PDF file will give you all the advice you will need. Some of our cameras will come with extra specific guidance or manuals to help that specific install. |
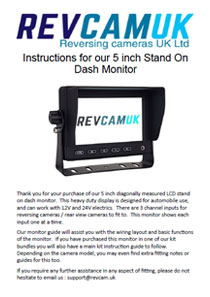 Click preview image to download the PDF file | MON5001 5 inch Vehicle Monitor Display Reversing Camera Monitor Fitting Instructions Our guide to the compact 5 inch monitor, it's fitting and menu settings. |
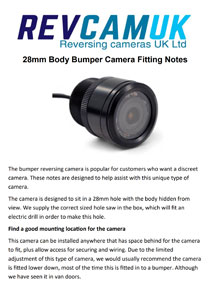 Click preview image to download the PDF file | Bumper reversing camera fitting guide Our flush fitting bumper camera designed to fit in to a 28mm hole (correct sized hole saw supplied). These instructions cover the fitting of the camera, including using the supplied angled spacer rings if required. |
If you are ordering the Mini Bade or Standard Blade Fuse Tap power option, then please see the further instruction sheet below dealing with this time saving connection method.
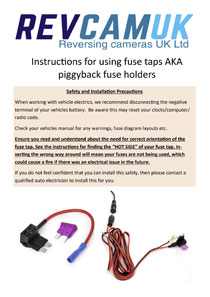 | Instructions for fitting Fuse Taps / Piggyback fuse holders for power supply Our guide on how to correctly install a piggyback fuse holder tap to power a reversing camera system from the fuse box. |
Technical Specification
Vehicle Monitor
5” Colour LCD screen
Power supply: 12V/24V
Power Consumption: 4W Max
Digital Screen Resolution: 800 x3(RGB)x480
Luminance: 350cd/m2
2 Inputs
PAL/NTSC/AUTO
Full function Remote Control
Reversing Camera
Image Device:1/3 Sony 600TVL CCD
TV System: PAL
Effective Pixels: 648H*488V
Resolution: 600 TV lines
Minimum Illumination:0.01 Lux (IR leds on)
Lens Angle 90 degrees (D)
Waterproof to Ip68
Infra red LEDs to provide night view
Mirror image
Mainland UK Shipping
We have three postage options to select from during checkout (on larger items eg kits there will be two options):
Royal Mail Tracked - Smaller / Lighter weight orders. This will be sent via Royal Mails Tracked Service. They will send emails/SMS to inform you of the tracking events. This option won't be shown for heavier weight orders.
DPD 2 Day. Small or large orders. This will be sent with DPD Local and should arrive within two working days (if you place the order before 12:30PM).
DPD Next Day. Small or large orders. This will be sent with DPD Local and should arrive the following working day (if you place the order before 12:30PM).
Highlands and Islands UK Shipping
We offer a 2-3 day service fulfilled with either Royal Mail Post, or Parcel Force. The prices charged are identical to mainland UK. Small orders will be sent via the post, larger orders via Parcel Force.
Outside of the UK Shipping
We shop around when selecting the best method for Europe (we avoid the cheap budget couriers due to parcels being lost). Southern Ireland is always sent via DPD. Other countries will usually be either Parcel Force, UPS, or Fedex. Please note that we require a phone number for international deliveries. Also if you are a company in Europe, a VAT number or EORI number will help speed up customs.
We remove the UK VAT (Tax) when any country other than the UK is selected in the shopping basket or checkout. From this point all prices on the site drop down to exclude VAT. If you are from the Channel Islands, please select Jersey / Guernsey from the country list in order to remove UK sales Tax.
60 day "Change of Mind" policy
We understand that for whatever reason you may need to return your purchase. We provide a 60 day opportunity for you to do just that. Simply give us an email or a phone call to let us know it is due back. You are responsible for the shipping back to us but you will receive a full refund including the original shipping we charged you for your order. We recommend getting a signed for or proof of postage when posting back to us.
All we ask is that you return the items in the condition they were sent in, with the packaging present. You are welcome to have temporarily tested the product and unravelled things, but if you have cut wires, soldered, glued, installed and used for a while then this wouldn't be suitable for returns under the change of mind policy.


